들어가기 전에...
Jenkins, SonarQube, Git, Ant Project를 사용하고 있다.
Maven, Gradle Project을 다루고 있는 사용자는 3번 과정을 생략하고 마지막의 Jenkins에 프로퍼티를 추가하는 방법을 사용하면 된다.
(3번이 빌드 파일을 수정해야하는 부분인데 빌드 파일을 다루는 방법이 모두 다르기 때문.)
물론 Maven이나 Gradle도 빌드파일을 수정하는 방법을 이용할 수 있으나, 본 포스팅에서는 다루지 않는다.
기존에 Jenkins와 GitHub 연동한 것은 다음과 같다.
- GitHub에 소스코드 commit & push
- 소스 코드의 변화 감지 후 Jenkins로 Webhook 발생
- 소스 pull -> build -> deploy
이제 SonarQube를 연동해 테스트부터 한 뒤에 build 과정이 이루어지게 해보겠다.
Jenkins 설치 ▼
SonarQube 설치 ▼
라이선스 참고: www.oss.kr/oss_license_qna/show/ed61838e-0d26-4551-98f4-1c8245551a1d
1. www.sonarqube.org/downloads/ 에서 파일 다운로드
2. zip 파일을 원하는 위치에 압축 해제
3. SonarQube 설치한 경로/bin/자신의 PC에 맞는 버전/StartSonar.bat 실행
3-1. java.lang.IllegalStateException: SonarQube requires Java 11 to run 에러
- 일반적으로 Java 11은 '분석'에 사용되고 프로젝트 빌드는 Java 8 또는 그 이하를 사용한다.
(Maven, Gradle, SonarLint 사용 시 자동으로 처리됨)
-> Java 11 버전 설치 (www.oracle.com/java/technologies/javase-jdk11-downloads.html)
자신의 pc에 맞는 버전을 선택해 zip파일을 다운받고, 원하는 위치에 압축 해제한다.
리눅스의 경우, yeonyeon.tistory.com/88 참고

-> SonarQube 설치 경로/conf/wrapper.conf 수정
wrapper.java.command=java               # 수정 전
wrapper.java.command=java 11 설치 경로   # 수정 후
4. http://localhost:9000/ 에 접속해 SonarQube 실행 확인
첫 로그인 시 디폴트 ID와 Password: admin
로그인 후에 자유롭게 비밀번호를 변경하면 된다.

SonarQube Scanner 설치 ▼
1. docs.sonarqube.org/latest/analysis/scan/sonarscanner/ 에서 파일 다운로드
2. zip 파일 원하는 위치에 압축 해제
1. SonarQube에서 프로젝트 생성
Projects - Add project - Manually
원하는 key와 name을 입력한 뒤, 토큰을 생성한다.
새로 생성하거나 이미 만들어둔 토큰이 있다면, 기존 것을 사용해도 된다.
토큰명은 아무거나 상관 없으며, 생성 후에 나오는 문자열은 복사해두는게 좋다.

토큰 새로 만들고 싶을때 ▼
My Account - Security - Tokens - Generate Tokens


2. Jenkins 플러그인 설치 및 설정
Jenkins 관리 - 플러그인 관리 - SonarQube Scanner 설치
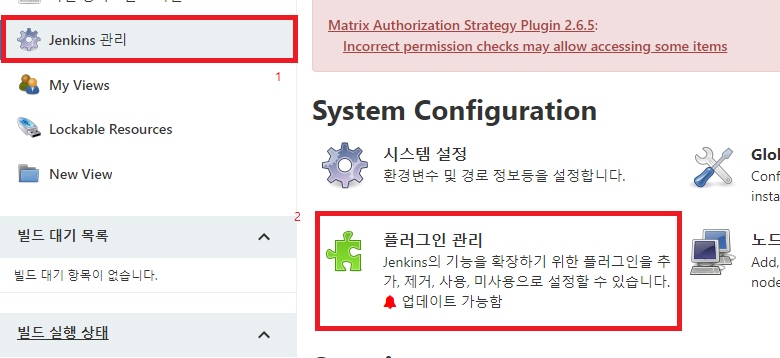

플러그인 설치 후에는 꼭 Jenkins를 재시작 해주자.
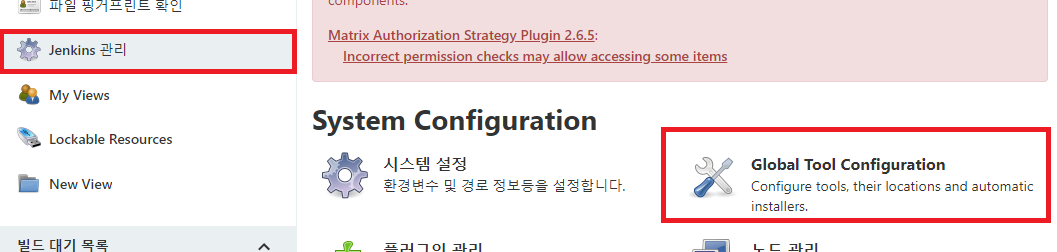
Jenkins 관리 - Global Tool Configuration - SonarQube Scanner - Add SonarQube Scanner 에서 소나큐브 스캐너를 등록해준다.


Jenkins 관리 - 시스템 설정 - SonarQube servers 에서 소나큐브와 소나큐브에서 발급 받았던 토큰을 등록한다.


3. build.xml 수정
프로젝트의 빌드 파일을 수정하자.
<?xml version="1.0"?>
<project name="testProject" default="main" basedir="." xmlns:sonar="antlib:org.sonar.ant">

	<target name="init">
		<!-- Define the SonarQube global properties (the most usual way is to pass these properties via the command line) -->
		<property name="sonar.host.url" value="http://localhost:9000" />

		<!-- Define the SonarQube project properties -->
		<property name="sonar.projectKey" value="SonarQube에 정한 Key" />
		<property name="sonar.projectName" value="SonarQube에 정한 Name" />
		<property name="sonar.projectVersion" value="프로젝트 버전" />
		<property name="sonar.sources" value="소스 코드가 존재하는 경로" />
		<property name="sonar.java.binaries" value="빌드 결과물 경로" />
		<property name="sonar.java.libraries" value="jar파일 모은 폴더/*.jar" />
		<property name="sonar.login" value="토큰" />
		<property name="sonar.scm.provider" value="git" />

		...
	</target>

	...
	<!-- Define SonarScanner for Ant Target -->
	<target name="sonar">
	    <taskdef uri="antlib:org.sonar.ant" resource="org/sonar/ant/antlib.xml">
	        <!-- ant 설치 폴더/lib에 jar 파일 미리 복사해두어야 함 -->
	        <classpath path="ant 설치 경로/lib/sonarqube-ant-task-*.jar" />
	    </taskdef>

	    <!-- Execute SonarScanner for Ant Analysis -->
	    <sonar:sonar />
	</target>
</project>
3-1. Not authorized. Analyzing this project requires authentication. Please provide a user token in sonar.login or other credentials in sonar.login and sonar.password. 에러
-> projectKey와 Name 등에 오타 없는지 검수
-> 또는 property에 토큰을 추가해주지 않아 발생하는 문제. SonarQube에서 발급 받았던 토큰을 확인하자.
<property name="sonar.login" value="본인 토큰" />
3-2. SCM provider autodetection failed. Both git and svn claim to support this project. Please use "sonar.scm.provider" to define SCM of your project. 에러
-> 파일에 git임을 명시
<property name="sonar.scm.provider" value="git" />
3-3. java.lang.IllegalStateException: No files nor directories matching '~~'
-> 말그대로 ~~라는 파일이나 디렉토리를 찾지 못했다는 에러다. 경로 설정을 잘 살펴보자.
빌드 파일을 수정하지 않고 Jenkins에서 직접 코드를 관리하기를 원한다면 다음 방법을 쓰면 된다.
프로젝트 구성 - Build - Execute SonarQube Scanner 추가 - JDK 및 properties 추가
여기서 주의할 것은 반드시 Invoke Ant보다 앞에 위치해야 빌드 전에 분석부터 할 수 있다.
Execute SonarQube Scanner 앞의 ▒ 같이 생긴걸 드래그하면 위치를 바꿀 수 있다.

sonar.host.url=http://localhost:9000
sonar.projectKey=키
sonar.projectName=이름
sonar.projectVersion=버전
sonar.sources=소스 코드 모인 폴더
sonar.java.binaries=빌드 결과물 모인 폴더
sonar.java.libraries=jar파일 모인 폴더/*.jar
sonar.login=토큰
sonar.scm.provider=git
이후 SonarQube ( http://localhost:9000 )에 들어가서 확인하면 된다.
+
build.xml을 수정하는 방법과 Jenkins에서 작성하는 방법은 한 가지 차이가 있다.

빌드 결과에 SonarQube 아이콘이 생기냐마냐의 차이다.
아이콘이 있는 경우는 클릭하면 바로 SonarQube로 이동되며,
아이콘이 없는 경우는 직접 SonarQube의 링크를 입력해 들어가면 된다.
참조
SonarQube 설치 에러: docs.sonarqube.org/latest/analysis/languages/java/
Jenkins - SonarQube 연동: oingdaddy.tistory.com/23
'Develop > etc' 카테고리의 다른 글
| [Gradle] gradle이란? (0) | 2021.04.16 |
|---|---|
| [Jenkins] JUnit과 연동 (0) | 2021.04.06 |
| 테스트 종류와 도구 (0) | 2021.03.31 |
| 웹 어플리케이션에 대해 (0) | 2021.03.25 |
| [Ant] Unable to find a javac compiler 에러 (0) | 2021.03.05 |


