네이버 API 등록
developers.naver.com/apps/#/register?api=nvlogin 접속


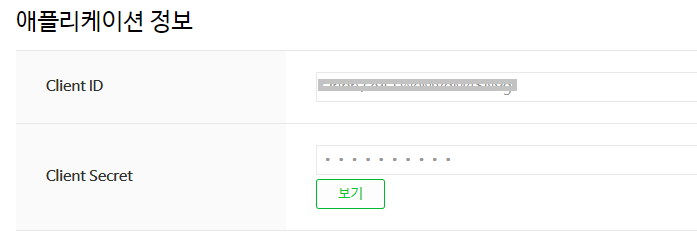
등록 후에는 Client ID와 Client Secret을 확인할 수 있다.

해당 키 값을 application-oauth.properties에 등록한다.
네이버에서는 스프링 시큐리티를 공식 지원하지 않기 때문에 전부 수동으로 입력해야 한다.
#registration
spring.security.oauth2.client.registration.naver.client-id=클라이언트아이디
spring.security.oauth2.client.registration.naver.client-secret=클라이언트시크릿
spring.security.oauth2.client.registration.naver.redirect-uri={baseUrl}/{action}/oauth2/code/{registrationId}
spring.security.oauth2.client.registration.naver.authorization-grant-type=authorization_code
spring.security.oauth2.client.registration.naver.scope=name,email,profile_image
spring.security.oauth2.client.registration.naver.client-name=Naver

# provider
spring.security.oauth2.client.provider.naver.authorization-uri=https://nid.naver.com/oauth2.0/authorize
spring.security.oauth2.client.provider.naver.token-uri=https://nid.naver.com/oauth2.0/token
spring.security.oauth2.client.provider.naver.user-info-uri=https://openapi.naver.com/v1/nid/me
spring.security.oauth2.client.provider.naver.user-name-attribute=response
코드 설명 ▼
user_name_attrribute=response
- 기준이 되는 user_name 이름을 네이버에서는 response로 해야 한다.
- 네이버 회원 조회 시 반환되는 JSON 형태
{
	"resultCode":"00",
        "message":"success",
        "response": {
            "email":"abc@naver.com",
            "nickname":"OpenAPI",
            "profile_image":"~~~.gif",
            "age":"40-49",
            "gender":"F",
            "id":"3223423",
            "name":"오픈API",
            "birthday":"10-01"
	}
}
spring security에서는 하위 필드를 명시할 수 없다.
최상위 필드만 user_name으로 지정이 가능하다.
하지만 네이버의 응답값 최상위 필드는 resultCode, message, response이다.
따라서 spring security 에서 인식 가능한 필드는 이 셋중에 골라야 한다.
본문에서 담고 있는 response를 user_name으로 지정하고, 이후 자바 코드로 response의 id를 user_name을 정하겠다.
스프링 시큐리티 설정 등록
OAuthAttributes에 네이버인지 판단하는 코드와 네이버 생성자를 추가했다.
@Getter
public class OAuthAttributes {
	private Map<String, Object> attributes;
	private String nameAttributeKey;
	private String name;
	private String email;
	private String picture;

	@Builder
    public OAuthAttributes(Map<String, Object> attributes, String nameAttributeKey, String name, String email, String picture) {
        ...
    }

    public static OAuthAttributes of(String registrationId, String userNameAttributeName, Map<String, Object> attributes) {
        if("naver".equals(registrationId)) {
            return ofNaver("id", attributes);
        }
        return ofGoogle(userNameAttributeName, attributes);
    }

    private static OAuthAttributes ofGoogle(String userNameAttributeName, Map<String, Object> attributes) {
        ...
    }

    private static OAuthAttributes ofNaver(String userNameAttributeName, Map<String, Object> attributes) {
        Map<String, Object> response = (Map<String, Object>) attributes.get("response");

        return OAuthAttributes.builder()
                .name((String) response.get("name"))
                .email((String) response.get("email"))
                .picture((String) response.get("profile_image"))
                .attributes(response)
                .nameAttributeKey(userNameAttributeName)
                .build();
    }

	public User toEntity() {
		...
	}
}
index.mastache에 네이버 로그인 버튼을 추가해줬다.
{{^userNames}}
<a href="/oauth2/authorization/naver" class="btn btn-secondary acitve" role="button">Naver Login</a>
{{/userNames}}
코드 설명 ▼
/oauth2/authorization/naver
- 네이버 로그인 URL은 properties에 등록한 redirect-uri 값에 맞춰 자동으로 등록된다.
- /oauth2/authorization/는 고정이고 마지막 Path만 각 소셜 로그인 코드를 사용하면 된다.
( 여기서는 naver가 마지막 Path )
http://localhost:8080/ 에 들어가면 연동된 것을 확인할 수 있다.
해당 게시글은 [ 스프링 부트와 AWS로 혼자 구현하는 웹 서비스 / 이동욱 ] 책을 따라한 것을 정리하기 위한 게시글입니다. 요약, 생략한 부분이 많으니 보다 자세한 설명은 책 구매를 권장합니다.
'Clone Coding > 스프링 부트와 AWS' 카테고리의 다른 글
| [AWS EC2] 서버 환경 만들기 (0) | 2021.01.22 |
|---|---|
| [Spring Security] 기존 테스트에 시큐리티 적용하기 (1) | 2021.01.22 |
| [OAuth 2] 구글 로그인 연동하기 (0) | 2021.01.21 |
| [Mustache & Spring] 전체 조회 화면 만들기 (0) | 2021.01.19 |
| [Mustache] 게시글 등록 화면 만들기 (0) | 2021.01.19 |


